Guide To Roof Flashing — Installation, Types, And Materials
Roofs have many components that contribute to their strength. Some of these important components are shingles, roof edges, the roof underlayment, roof vents, roof flashing, gutters, and even downspouts. All these essential components work together to provide protection to the house.
If you’re like most people who don’t study roofing, you might not be familiar with the term “flashing.” That’s okay.
Here’s a handy guide to roof flashing…
What Do We Mean By Roof Flashing?
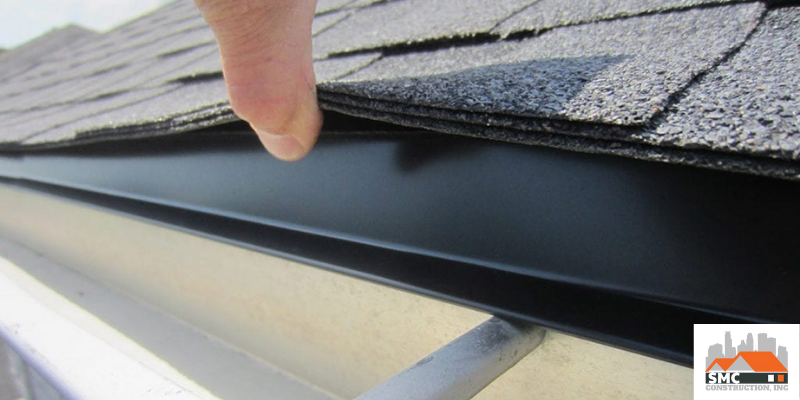
Roof flashing is a layer of thin protective metal that is installed by professional roofing contractors to keep the roof dry. It is meant to direct the flow of water in a direction away from the roof chimneys, as well as valleys of the roof and walls of the roof. It is considered one of the most essential roofing materials that every roof must have. The metal that is used for flashing can be of different types, such as steel, copper, aluminum, and others. You can choose the metal that is most aesthetically appealing while also providing durability to the roof. Moreover, make sure that the metal that is being used for the roof flashing is within your budget.
Understanding The Installation Process For Roof Flashing
The installation process of roof flashing is different for different types of flashing.
Here are the most basic steps of roof flashing installation used for almost all types of roof flashing…
#1 The First Steps
If flashing is to be installed on a new roof, then initially the contractor needs to work on the roof underlayment of the flashing under the shingles, and then the shingles are placed over it. In some scenarios, the shingles are already placed, so the contractor needs to remove those shingles, install the flashing, and then reposition the shingles.
#2 Start With The Kickout Flashing
While installing the flashing, one needs to initially install the kick-out flashing and then keep moving their way up. This is because the kick-out flashing needs to be on the base of the roof and then cement can be used to strengthen the bond.
#3 The First Shingle Should Be Placed On The Main Strip
After the kick-out flashing has been laid, keep the flashing protected with cement and some nails. This will ensure that the flashing does not come out. After that, a contractor places the first set of shingles on the flashing.
#4 Finishing The Process
When the very first shingles are laid down, they should give a seamless look to the roof. Installation of flashing is a complex process, especially when the flashing needs to be laid around chimneys, skylights, and roof vents because these are complex structures. It is always better to have professionals do the work rather than try and do-it-yourself.
There are different types of flashing…
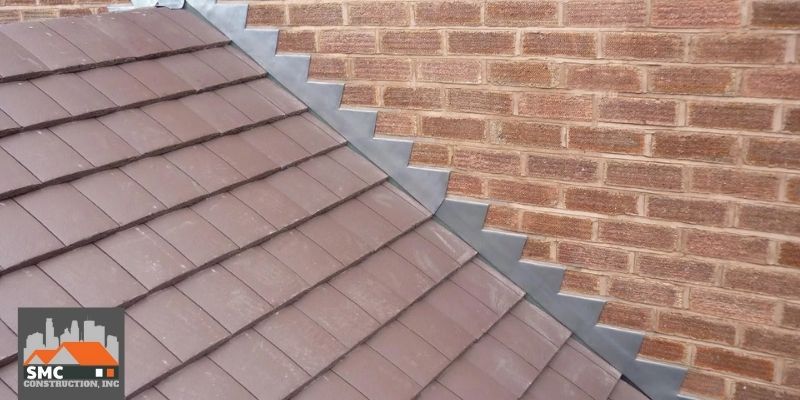
Base Flashing Of The Roof
This flashing is installed where the roof structure meets the vertical edge of the chimney. It is used for directing the water that gets collected due to rainfall.
Continuous Flashing Of The Roof
This refers to the long metallic piece that will cover up the larger joints of the roof walls and does not let water penetrate inside the house.
Counter Flashing Of The Roof

Counter flashing is used in the form of secondary flashing. It is used for extra protection and is usually installed before the base flashing.
Skylight Flashing Of The Roof
If your roof has multiple skylights, then you would require multiple flashing to protect all the skylights. For this purpose, skylight flashing is used to ensure the seal is fixed around each skylight tightly.
Summary
Flashing helps direct water off the roof properly so it doesn’t seep into the roof underlayment and cause your roof to rot. It’s an essential component of any roofing system. Oftentimes, there can be water leaks coming from damaged flashing. If you notice water stains on your ceiling or down your walls, you might have a flashing issue that needs to be addressed. SMC Construction can inspect your flashing and make needed repairs.
Build Your Dream with SMC
Below are some recent reviews from our raving customers.
Request Your Consultation Today
Please click the button below and submit the form on the next page to request a free estimate. If you want to contact us via phone instead, you can do so at 763-400-0251.